
In the following tutorial you will learn to make a simple firebase application step by step using the firebase cloud functions.
Installing Firebase CLI
For creating a cloud functions project we need to install Firebase Command Line Tools. For installing firebase CLI in your system make sure that NPM is already installed.
Execute the following command in the terminal to install the firebase-tools package.
$ npm install -g firebase-tools
Create a new Firebase Cloud Functions Project
After installing Firebase-tools now we need to login to the Firebase console. For this type the following command:
$ firebase login
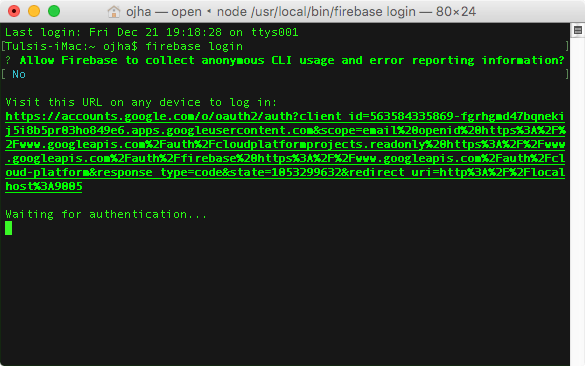 This should open up the browser and load the firebase console login. Create new account if you don’t have any Firebase account already. If you already have Firebase account then simply login in using it.
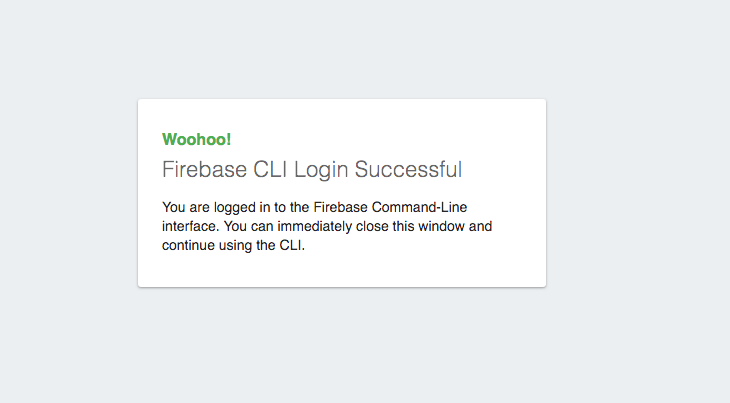
After logging in you will see the Firebase CLI Login Successful message as below.
This should open up the browser and load the firebase console login. Create new account if you don’t have any Firebase account already. If you already have Firebase account then simply login in using it.
After logging in you will see the Firebase CLI Login Successful message as below.
Initializing the project
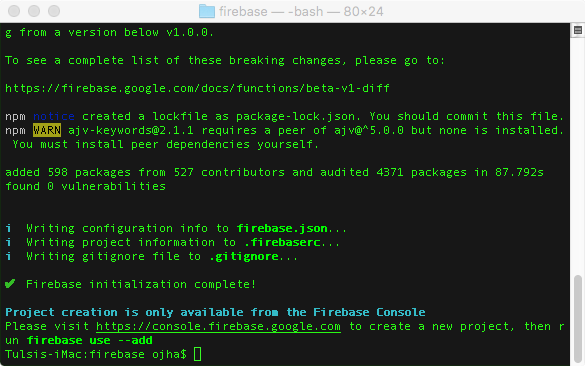
Now create new folder and change the directory to that folder. After that initialize the project by typing the following command:
$ firebase init functions
After typing above command you will see following screen.

Now select [create a new project] using arrow keys.
And after that choose Javascript as the programming language.
Respond to yes when it asks about installing dependencies using npm.
Creating project at Firebase console
Now Visit - https://console.firebase.google.com Firebase console website.
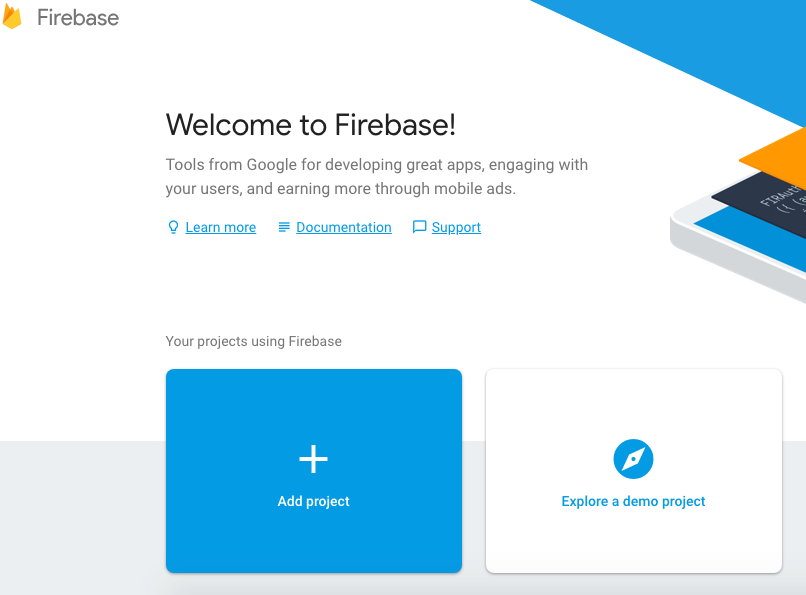
Now create new project by clicking on Add project button.
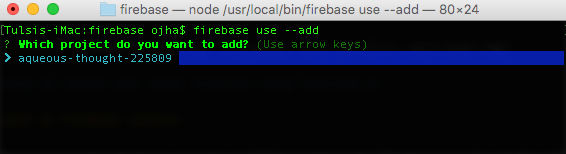
After creating the project return to terminal and type following command:
$ firebase use --add
After executing above command select your project using arrow keys and after that give an alias name.
 Now you are ready to create your first firebase cloud function.
Writing your first function
Now open the folder that you created earlier, you will see a folder called as functions and a file called as firebase.json
And in the folder functions, there will be a node js file called as index.js.
Now open this index.js file in your favourite text editor. We will edit this file to create our function.
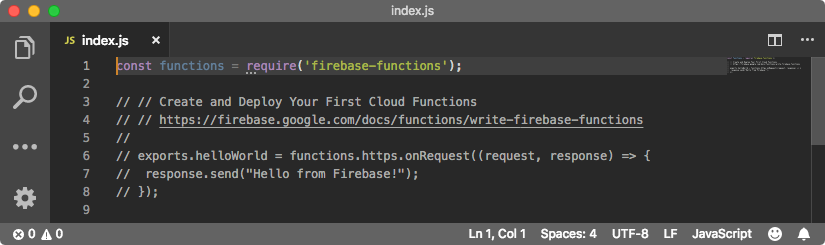 After opening index.js file you will see some statements already added by firebase. We need to add and import some statements to setup the required functions, and the initialization of the firebase admin.
In this project we will create a function that will be triggered by HTTP request.
Here we will import cloud functions and Admin SDK modules using Node require statements.
Now type the following code:
const functions = require('firebase-functions');
const admin = require('firebase-admin');
admin.initializeApp(functions.config().firebase);

exports.firstFunction = functions.https.onRequest((request, response) => {
 response.send("My first function in the firebase cloud function");
});
These lines load the firebase-functions and firebase-admin modules, and initialize an admin app instance from which Realtime Database changes can be made.
In the above code firstFunction() is HTTP endpoint that will be executed.
We are using functions.https so that the function can be triggered through an HTTP request.
response.send() in our function sends a string "My first function in the firebase cloud function" as a response.
Now our function is complete.
Deploy our function to firebase
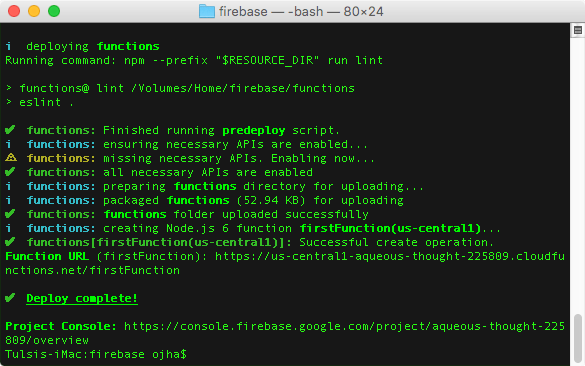
Now for deploying our functions we need to type following command in terminal.
$ firebase deploy --only functions
After executing above command you will see following screen.
Testing our function
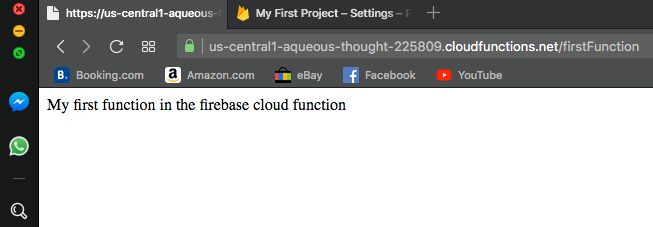
For testing our function you need to visit to the function url provided in the console or you can access it from the firebase console too.
In our example I have the url
https://us-central1-aqueous-thought-225809.cloudfunctions.net/firstFunction
Thanks for visiting…