In our first app project, we had only printed the message Hello World in the browser page as shown in below image.
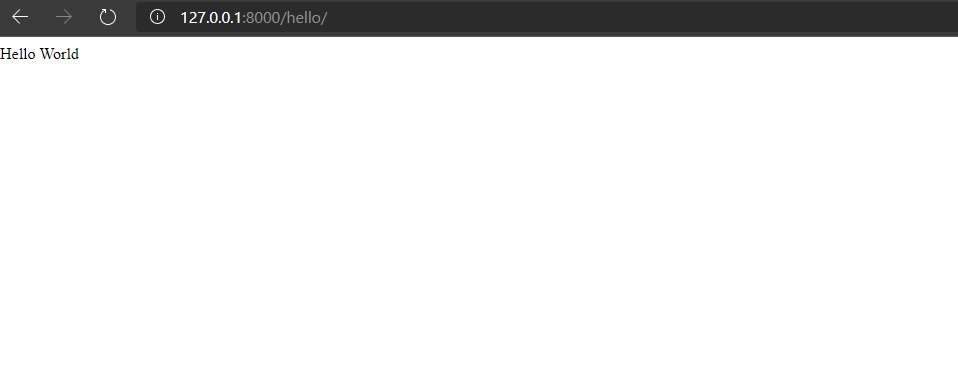
And our view code was as below.
from django.shortcuts import render
from django.http import HttpResponse

def index(request):
	return HttpResponse('Hello World')
If we observe our view code then we can see that we provided a HttpResponse() whenever our view is accessed through browser url.
Now we want to load the entire html file instead of printing some text message.
To do that we will use the render() function provided by django.
Let’s get started!!!
Creating Django project and app
As I have already discussed this step in earlier project therefore in this project I will not go into detail of how-to process of this step. Please review Django First App project for more detailed steps and explanation.
Make sure that you have already installed python, django and activated virtual environment.
- On your command prompt or terminal type following to create django project.
django-admin startproject djangoHtmlProject .Above command will create django project named
djangoHtmlProjectin current directory. - Now to create django app type following command
django-admin startapp htmlApp
Above command will create django app named htmlApp in current directory
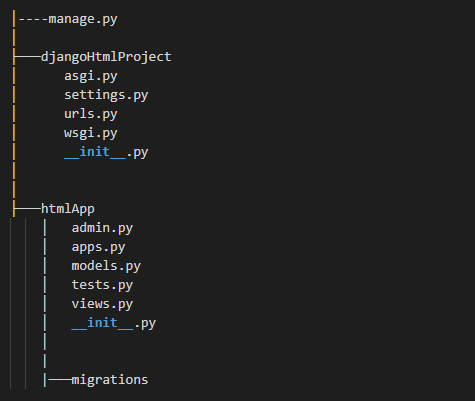
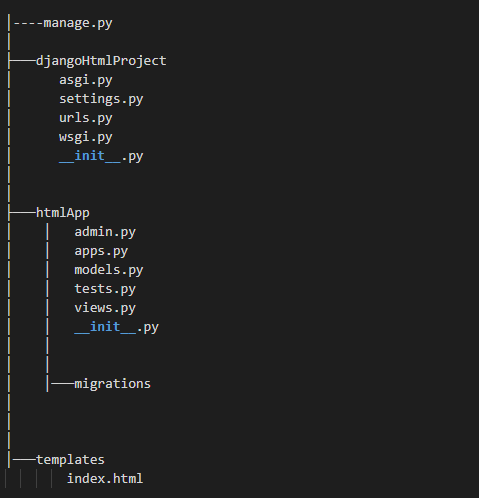
Our project directory structure will look like below image
Adjusting the Django settings
Now we need to connect our app to django project.
-
After creating the app we need to connect our app to django project. To connect our app to django project, open the
settings.pyfile underdjangoHtmlProjectfolder. -
Now import
osmodule to top of file as shown below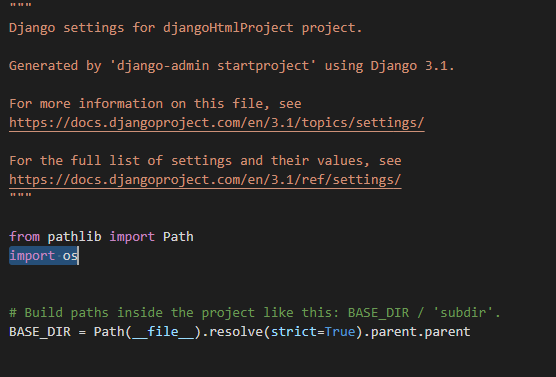
-
Next step is to add our app, add
htmlAppunderINSTALLED_APPSsection. It should be something like below image.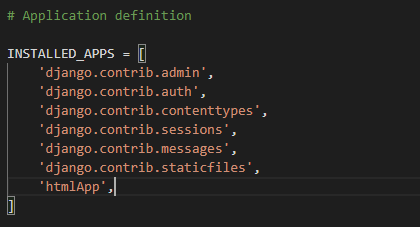
-
Next step is to add template directory to
TEMPLATESsection. Addos.path.join(BASE_DIR,'templates')underTEMPLATES->DIRSas shown below: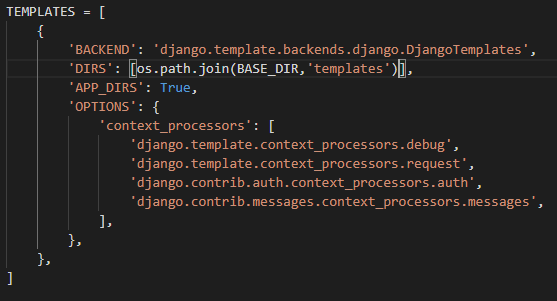
-
Now create a directory called as
templatesin the root of the django project directory as below image:

Creating our HTML file
We will create very simple html file.
Open your text-editor and save the file as index.html inside templates folder with below content.
<html>
    <head>
        <title>Django Project</title>
    </head>
    <body>
        <p>This is a simple django project</p>
        <h1>We are <i>rendering</i> <font color=RED>html</font> file in django<h1>
    </body>
</html>
Project directory review..
Creating our view
Open views.py under your django app and add the following code to it.
from django.shortcuts import render

def index(request):
	return render(request, "index.html")
In the above code, we have three important statements.
importstatement to importrender module.- Our view function i.e.
index() - The
render()function
Here the render() function is as follow:
render(request, template_name, context=None, content_type=None, status=None, using=None)
- The
requestand thetemplate_nameare the required parameters. Heretemplate_nameis the name of our html file. - The
context,content_type,statusandusingare the optional parameters.
We will discuss more about these parameters later.
Providing URL to our view
- Open
urls.pyunderdjangoHtmlProjectfolder - If you open the
urls.pyfile you will see something like below
from django.contrib import admin
from django.urls import path

urlpatterns = [
path('admin/', admin.site.urls),
]
Now you need to import your view that is index
And provide it a url like below code.
from django.contrib import admin
from django.urls import path
from helloworld.views import index

urlpatterns = [
path('admin/', admin.site.urls),
path('hello/', index),
]
Here we have added two lines of code
First is from helloworld.views import index
This will import our view so that we can access it to provide a url.
Second is path('hello/', index),
This one will provide a url to our view index.
Testing our app
- To launch the server type following command
python manage.py runserver - To test our app open browser and enter this url http://127.0.0.1:8000/hello/
If you will open above url. Then you will see the following page.
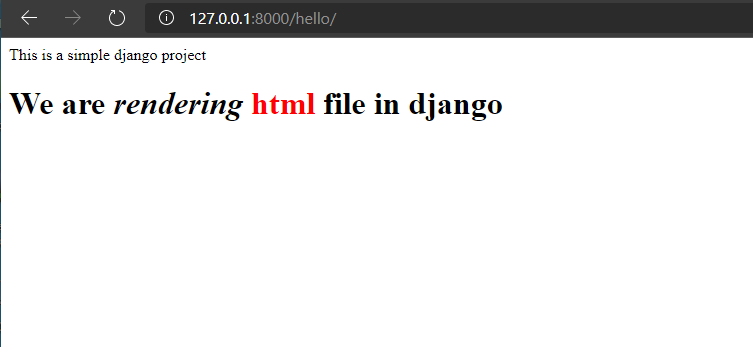
That’s it, our Second project on django is completed.
The source code for this project is hosted in my github repo. Please feel free to use and have queries.


